The Ultimate Guide to Removing Your TV from a Wall Mount
Introduction: Safely Removing Your TV from the Wall Mount
Mounting a TV on the wall is a sleek and space-saving solution, offering a modern touch to your living space. However, there comes a time when circumstances prompt the need to bid farewell to the wall-mounted spectacle, whether it's for a room revamp, relocation, or a simple upgrade. Safely detaching your TV from the wall mount is a crucial endeavor to ensure both the longevity of your television and the pristine condition of your wall.
In this guide, we will navigate the intricate process of safely removing your TV from its wall mount, providing you with a comprehensive set of instructions and essential tips. Whether you're a DIY enthusiast or a first-time wall mount disassembler, our step-by-step approach will empower you to undertake this task with confidence and precision. Let's embark on the journey to liberate your TV from its wall-mounted abode without a hitch.
Identifying Your Wall Mount Type
Before you embark on the journey of safely removing your TV from the wall, it's imperative to familiarize yourself with the type of wall mount that cradles your entertainment centerpiece. Wall mounts come in various designs, each with its own set of mechanisms and attachment points. Understanding the specific type you have is the key to a smooth and hassle-free unmounting process. Don't know what type of wall mount you have? Refer to our TV Mounts here.
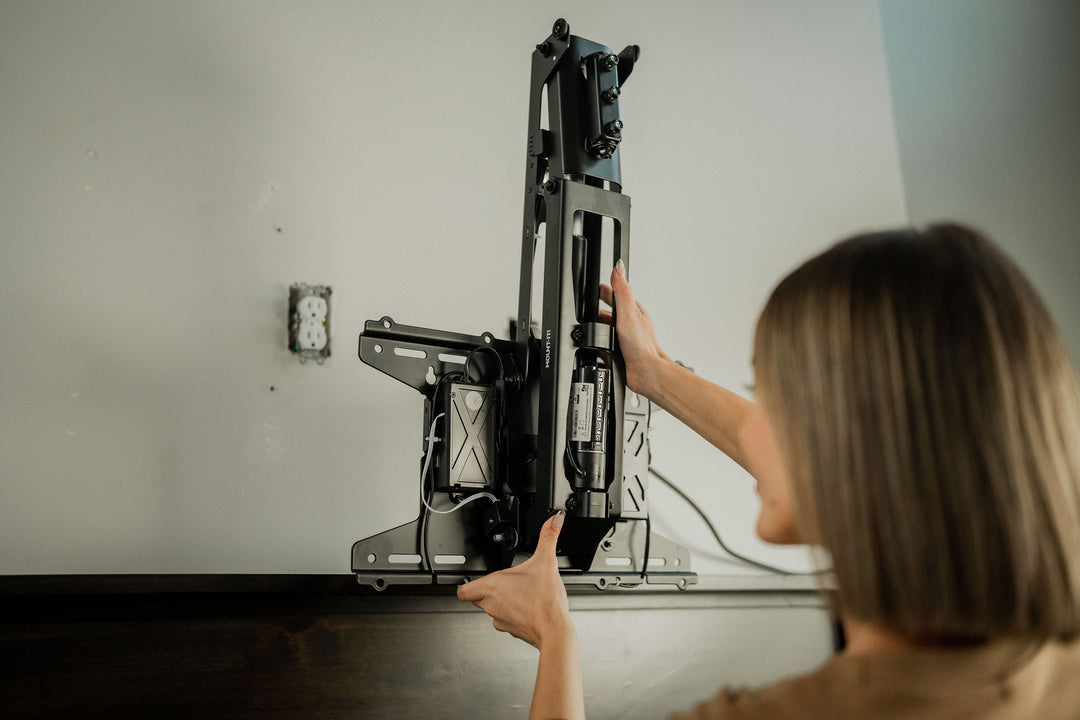
Before removing your TV from the wall, understanding the type of wall mount is crucial for a smooth process. Common wall mount types include fixed, tilting, and full-motion (swivel and articulating) mounts, each with unique features. To identify your wall mount:
- Inspect the Mounting Bracket: Fixed mounts have a simple, flat bracket, while tilting and full-motion mounts have additional moving parts.
- Check for Articulating Arms or Joints: Articulating mounts allow the TV to move away from the wall. Look for swiveling arms or joints.
- Review the Manual: Consult the wall mount's user manual for detailed information about features, installation, and removal.
- Measure the Range of Motion: Test whether your mount allows for tilting or swiveling. Be cautious not to force any parts to avoid damage.
- Consider Professional Assistance: If unsure about your wall mount type or if the unmounting process seems complex, seeking professional assistance is recommended.
Understanding your wall mount type is the initial step toward a successful unmounting endeavor. Armed with this knowledge, you'll be better prepared to follow the appropriate steps for your specific mount, ensuring a safe and efficient process as you liberate your TV from its wall-mounted perch.
Tools You'll Need for TV Removal
Before removing your TV from its wall mount, it's crucial to have the right tools to ensure a smooth and damage-free process. The essential tools include:
- Screwdriver/Power Drill (Phillips or Flathead): Necessary for loosening the screws securing the TV to the wall mount. The specific type depends on your mount's screws.
- Stud Finder: Vital for locating wall studs, ensuring the mount is securely anchored for proper support.
- Adjustable Wrench or Pliers: Useful for handling nuts and bolts, especially in mounts with additional components that need tightening or loosening.
- Assistance: Enlist the help of a friend or family member, especially for larger and heavier TVs, ensuring a safer and more manageable removal process.
Store removed screws and components in a labeled bag, ensuring everything is on hand if you decide to remount the TV or make adjustments later. Equipped with the right tools and safety measures, you can confidently and seamlessly tackle the task of removing your TV from its wall mount. Taking the time to gather the necessary equipment is key to a successful and damage-free unmounting experience.
Tips for Tilting and Articulating TV Mounts
Tilting and articulating TV mounts offer flexibility and versatility, allowing you to adjust your TV for optimal viewing angles. However, uninstalling these mounts requires a bit more attention to detail compared to fixed mounts. Here are essential tips to ensure a smooth and trouble-free disassembly of tilting and articulating TV mounts:
- Study the range of motion to understand how the mount moves.
- Ensure the TV is in a neutral position before starting the uninstallation.
- Locate and disengage any locking mechanisms or safety tabs on the mount.
- Check for hidden screws or locking mechanisms on arms or brackets.
- Enlist a helper to provide support during the disassembly process.
- Detach all cables, including power cords and HDMI cables, before lifting the TV.
- Tilt the TV gradually and with control, ensuring secure positioning.
- Check for potential obstructions behind the TV before lifting it.
- Follow the manufacturer's guidelines and consult the manual for specific instructions.
- Inspect wall attachments after TV removal, ensuring screws and bolts are secure.
By following these tips and exercising caution, you can successfully uninstall a tilting or articulating TV mount without compromising the integrity of your TV or the mount itself. Taking the time to understand the unique features of your mount ensures a trouble-free disassembly process.
How to Handle Fixed and Low-Profile TV Mounts
Fixed and low-profile TV mounts provide a sleek and unobtrusive look while securely holding your TV against the wall. Uninstalling these types of mounts is generally straightforward, but it's important to follow proper steps to ensure a smooth disassembly process. Here's a step-by-step guide on how to handle fixed and low-profile TV mounts.
- Gather necessary tools: screwdriver, level, and stud finder.
- Power off and unplug the TV for safety.
- Use a stud finder to locate wall studs for stability.
- Remove wall plate covers if present, exposing mounting screws.
- Check for additional locking mechanisms and disengage if necessary.
- Loosen and remove screws attaching the TV to the mount.
- Lift the TV slightly to disengage it from the wall mount's bracket system.
- Check for hidden cables, disconnecting any remaining connections.
- Inspect the wall for damage or holes left by the mount.
- If reusing the mount, secure it to the wall using appropriate screws.
- Store screws and components in a labeled bag for future use.
By following these steps, you can safely and effectively uninstall a fixed or low-profile TV mount. The process is relatively straightforward, making it accessible for DIY enthusiasts and those unfamiliar with TV installations.
Dealing with Cable Management During Dismounting
When dismounting your TV, effective cable management is crucial for a smooth process and hassle-free reinstallation. Start by powering down and unplugging the TV, identifying and labeling cables, and disconnecting peripherals. Secure loose cables with ties and carefully detach wall-mounted cables, organizing them into bundles. Consider using clips or channels to maintain a clean appearance. Labeling and documenting the cable setup, as well as storing cables safely, ensure a seamless dismounting experience and set the stage for an organized remounting in the future.
Patching and Repairing Wall After TV Removal
After removing your TV from the wall mount, it's important to patch and repair any holes or damage left behind. Here's a guide:
- Gather Materials: Collect spackle, putty knife, sandpaper, matching paint, paintbrush, painter's tape, and a drop cloth.
- Clean the Area: Clear the damaged area of dust and debris using a clean cloth for better adhesion.
- Fill Holes with Spackle: Use spackle or joint compound to fill small holes, applying with a putty knife. For larger holes, use a wall repair patch before applying the compound.
- Smooth and Dry: Smooth the surface with the putty knife and let it dry according to product instructions.
- Sand the Patched Area: Use fine-grit sandpaper to achieve a smooth finish on the dried patch.
- Wipe Away Dust: Clean the area with a damp cloth to remove any sanding dust.
- Painting: Paint the patched area with matching paint, using a brush or roller. Feather the paint into the surrounding wall for a seamless blend.
- Protect Surrounding Areas: Use painter's tape and a drop cloth to protect adjacent surfaces from paint splatter.
- Allow Paint to Dry: Let the paint dry completely, applying additional coats if necessary.
Completing these steps ensures a polished and visually appealing result, leaving no evidence of the wall mount installation on your wall.
Post-Removal: What to Do with Your Wall Mount
Once you have removed your TV from the wall mount, you have several options for what to do with the wall mount:
- Store for Future Use: If you plan to reattach your TV to the wall mount in the future, it's wise to store it safely. If you do plan on remounting your TV mount, read through our Ultimate Guide to TV Mounting for tips and techniques. Keep all the components, screws, and brackets together in a labeled bag or container. Store the wall mount horizontally in a dry and secure location.
- Dispose Responsibly: If you no longer need the wall mount, consider recycling or disposing of it responsibly. Check with local recycling centers or electronic waste disposal facilities for guidance on proper disposal methods. Some locations may have specific regulations for electronic waste.
- Donate or Sell: If the wall mount is in good condition and compatible with other TVs, you might consider donating it to a local charity or selling it online. Someone else might find it useful for their TV setup.
- Check for Compatibility: Before disposing or donating, check the compatibility of the wall mount with various TV sizes and weights. Some mounts are versatile and can be used with different TVs.
- Document for Reference: Take photos or make notes of the wall mount's specific features, dimensions, and any unique characteristics. This documentation can be helpful if you decide to purchase a new mount in the future.
- Recycle Electronic Components: If the wall mount includes electronic components such as motors or sensors, explore options for recycling these components. Many recycling centers accept electronic waste for environmentally friendly disposal.
- Refer to Manuals: Consult the wall mount's manual for any specific instructions on storage, maintenance, or disposal. Manuals often provide guidance on the proper handling of components and the mount itself.
Choose the option that best suits your needs and aligns with your sustainability goals. Whether storing, recycling, donating, or selling, handling the wall mount responsibly ensures it either finds a new purpose or is disposed of in an environmentally friendly manner.