
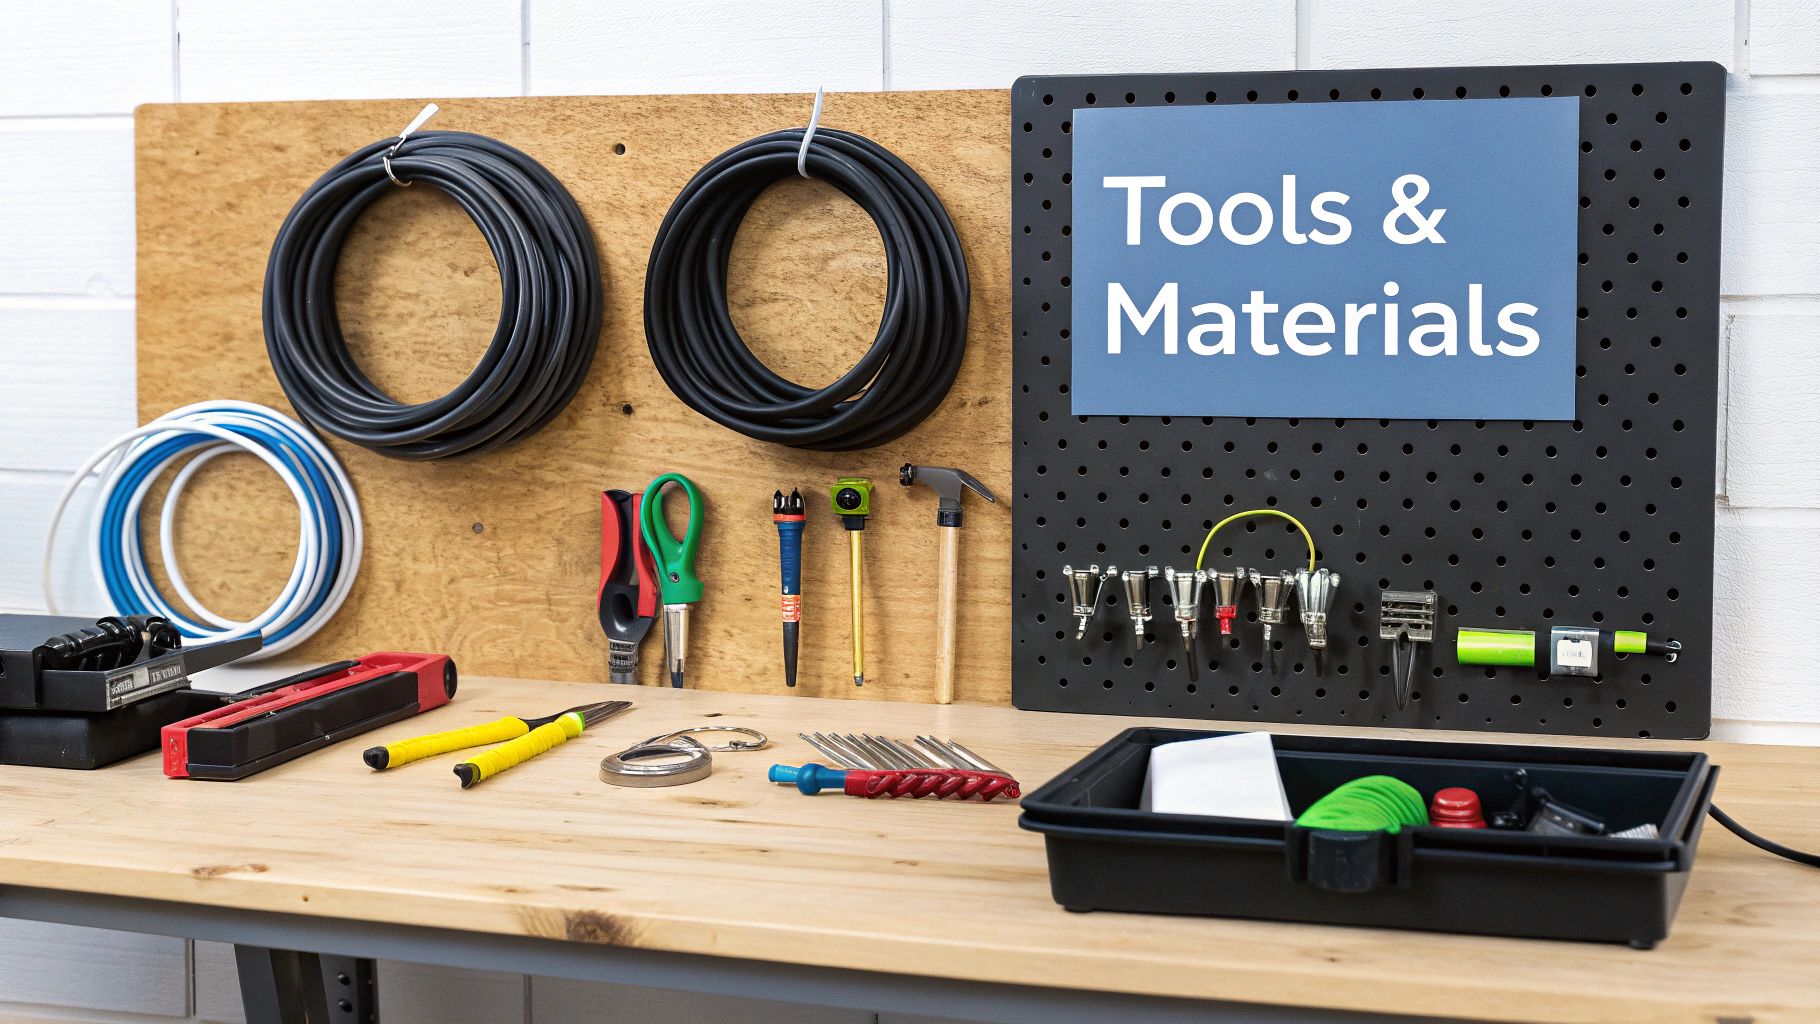
Essential Tools and Materials That Actually Matter
Let’s be honest—half the battle of hiding wires behind a wall-mounted TV is won by having the right gear before you start. Showing up with the wrong tools is like trying to cook a gourmet meal with just a microwave. You might get something done, but it won't be pretty. Professional installers know that a few specific items separate a clean, Saturday-morning project from a multi-week repair nightmare.
The Non-Negotiable Toolkit
Forget the sprawling 100-piece kits. You need a core set of reliable tools to get this done right. Your most important ally is a good stud finder. It's the only thing preventing you from accidentally trying to cut into solid wood or, even worse, a pipe. Once you've marked your safe zones, you'll need a sharp utility knife or a drywall saw to make clean, precise cuts into the wall.
Of course, a power drill is a must-have, not just for the TV mount itself but also for creating the openings for your cables. A common rookie mistake is using any old drill bit. For a truly professional finish, use a paddle bit or a hole saw that matches the size of your new outlets. This creates a much cleaner opening and makes feeding the wires a breeze. These tools work hand-in-hand with recessed cable plates, which create those sleek entry and exit points you see in professional setups.
This image shows the basic process of feeding wires through the wall.
Gear That Makes the Job Dramatically Easier
Now for the items that will make you feel like a pro. The secret weapon for navigating the dark, insulated world behind your drywall is fish tape. Spending an extra $15 on this flexible steel or fiberglass rod can save you hours of pure frustration. It’s designed specifically to snake through wall cavities and pull your cables along with it.
Another game-changer is a pre-packaged in-wall power kit. These kits are a fantastic investment because they are code-compliant and include everything you need to safely run power behind the wall, a common requirement in over 65% of modern installations. This means you can get a safe, professional result without having to call an electrician.
To help you decide what you truly need versus what's just nice to have, here's a quick comparison of the gear involved.
Essential Tools vs Optional Equipment Comparison
A detailed breakdown comparing must-have tools versus helpful additions for wire hiding projects
| Tool/Material | Essential Level | Approximate Cost | Purpose |
|---|---|---|---|
| Stud Finder | Essential | $20 - $50 | Locates studs, pipes, and electrical wiring to prevent dangerous mistakes. |
| Drywall Saw/Utility Knife | Essential | $10 - $25 | Makes clean, precise cuts in drywall for outlet plates. |
| Power Drill | Essential | $50 - $150+ | Drills holes for mounting and creates openings for cables. |
| Fish Tape | Highly Recommended | $15 - $30 | Pulls cables through the wall cavity, saving significant time and frustration. |
| In-Wall Power Kit | Highly Recommended | $50 - $100 | Provides a code-compliant, all-in-one solution for safely running power. |
| Paddle Bit/Hole Saw | Recommended | $10 - $20 | Creates perfectly sized, clean holes for cable plates. |
Having the essential tools will get the job done, but adding the highly recommended items like fish tape and an in-wall power kit is what separates a frustrating DIY struggle from a smooth, professional-looking installation.
Reading Your Walls Like a Professional Installer
 What’s the real difference between a DIY TV installation and a professional one? It's not just about the clean final look; it’s the detective work that happens before you even pick up a drill. The secret to a perfect setup is knowing exactly what’s behind your drywall. Trust me, what you don’t know can turn a simple weekend project into a costly repair job. So, before you start thinking about how to hide wires behind a wall mounted TV, you need to become a wall whisperer.
Getting a handle on your home's construction is crucial for a safe and clean installation, much like the planning that goes into a full internal wall renovation. This means you need to do more than just a quick pass with a stud finder; you have to learn to read the signs your walls are giving you.
Identifying Your Wall Type
Most modern homes have drywall over wood studs, but that’s not a universal rule. If you live in an older home or a newer apartment, you might be dealing with something entirely different. Here’s a quick rundown of what you might find:
- Drywall and Wood Studs: This is the most common setup. Studs are usually spaced 16 inches apart, but don't be surprised to find 24-inch spacing. Your stud finder will be your most valuable tool here.
- Plaster and Lath: Often found in homes built before the 1950s, these walls are thick, heavy, and can be brittle. A basic stud finder might not cut it. I recommend a magnetic one that can locate the nails holding the lath to the studs.
- Drywall and Metal Studs: Common in newer apartments and commercial buildings. Hiding wires in these walls requires specific drill bits and anchors. Make sure your stud finder has a setting for detecting metal.
Mapping Out Hidden Obstacles
Once you know what your wall is made of, it's time to scout for hidden roadblocks. A good stud finder does more than locate studs; many models can also detect live AC wiring. A hard-and-fast rule is to never cut directly above or below power outlets or light switches, as wiring almost always runs vertically from these fixtures.
Another thing to watch for is fire blocking. These are horizontal pieces of wood that builders place between studs to slow the spread of a potential fire. If you’re fishing wires down the wall and hit one of these, you'll either have to drill through it (carefully!) or find a new route. Taking the time to map out these potential snags will save you from a major headache later. This initial reconnaissance also helps you figure out the best mount for the job. For a deeper dive on that, take a look at our guide on how to choose a TV wall mount.
Mastering the In-Wall Installation Method
For that super clean, "floating TV" look, nothing beats running your cables directly inside the wall. This is the secret to making all those messy connections completely disappear. While it might sound like a job for a pro, it's a project most DIYers can handle with some careful planning, transforming the whole vibe of your room. It’s less of a trend and more of a smart, practical way to get a clutter-free space.
Perfecting the Placement and Cut
The real key to a flawless in-wall installation is all in the prep work. You'll be making two cuts in your drywall: one hidden behind the TV and another down near your power outlet and media console. Before you even think about cutting, measure everything twice. The top opening needs to be completely covered by the TV, and the bottom one should be low enough to be out of sight behind furniture.
When you're ready, grab a sharp utility knife or a drywall saw to carefully trace the outline for your recessed cable plate. A steady hand here is your best friend—it prevents a ragged hole that will be a headache to patch up later. Take your time; a clean cut makes the rest of the job so much smoother. If your home has some quirky wall construction, our advice on how to mount a TV on the wall without studs might be helpful, as it covers some alternative situations.
This infographic lays out the essential checks you should perform before you start.
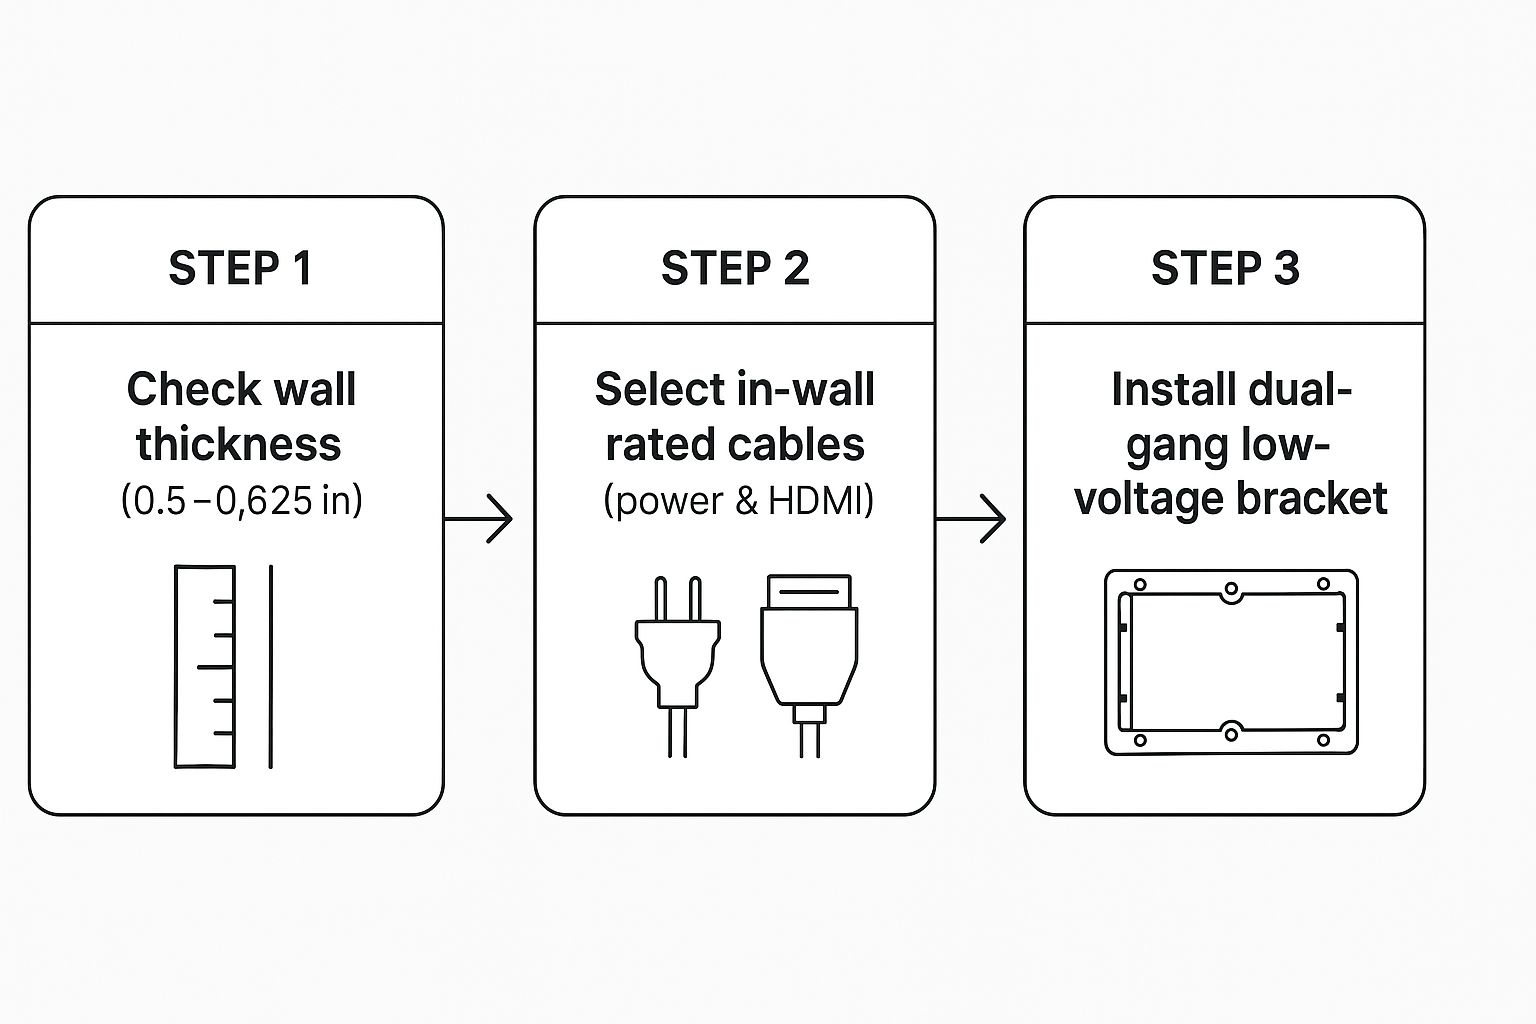
As you can see, success really starts with preparation. From checking your wall's thickness to making sure you have the right, code-compliant materials, getting everything in order first is crucial.
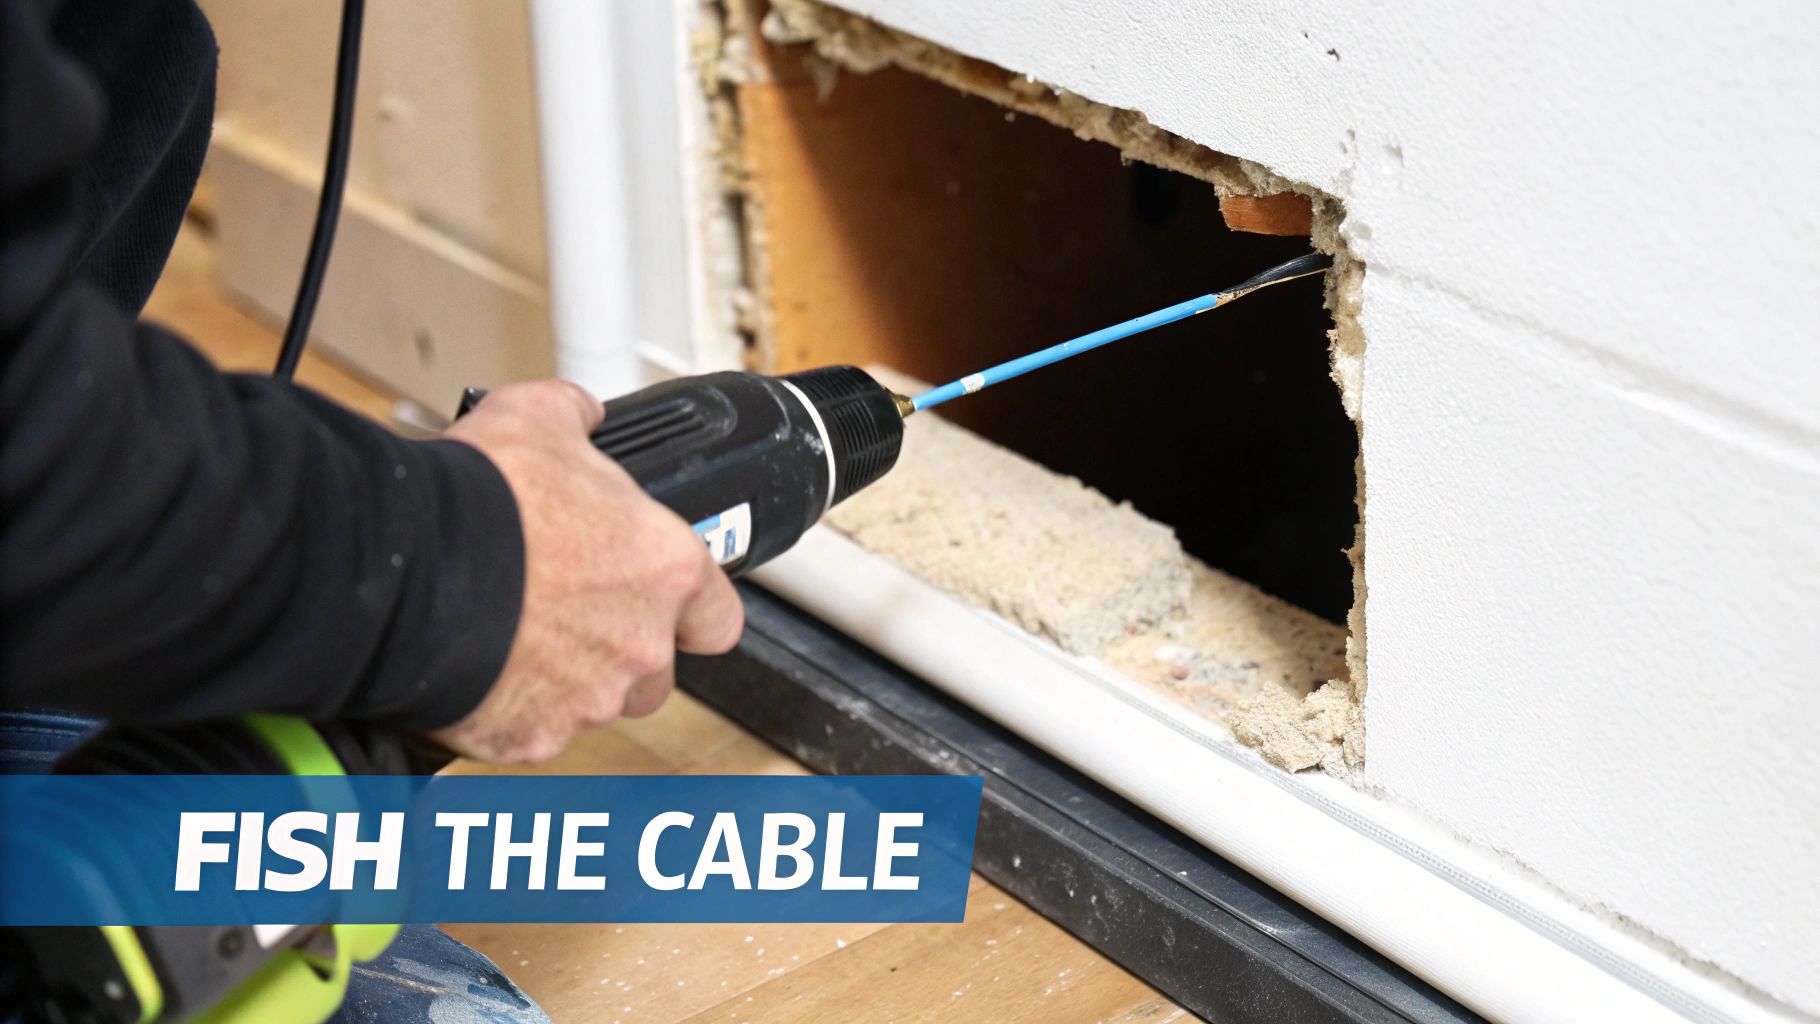
Fishing Wires and Finishing Touches
With your holes cut, it's time to get the cables through the wall. This is where a fish tape really proves its worth. It helps you guide the wires down through the wall cavity, especially if you run into insulation. This method has become incredibly popular, now used in over 65% of modern TV setups because of its clean look and safety advantages.
Speaking of safety, you must use in-wall rated cables, which will be marked with a CL2 or CL3 rating. This is non-negotiable, as it ensures your setup meets electrical safety codes. You can learn more about the specifics of running wires through walls on homedepot.com. Once you've threaded all your cables, just pop on the recessed cable plates, and you’ll have a professional-looking finish.
Surface-Mounted Solutions That Don't Look Amateur
Cutting into your walls isn’t always an option, especially if you’re renting or just aren't ready for that kind of project. Thankfully, there are plenty of ways to hide the wires from your wall-mounted TV without needing to perform drywall surgery. The trick is to look beyond those basic, flimsy plastic channels and find solutions that look intentional and polished. You can get a surprisingly clean finish with the right surface-mounted gear.
Going Beyond Basic Plastic Raceways
We've all seen the standard adhesive-backed cord raceway. While it gets the job done, it often looks like an afterthought. To really make this approach work, pick a wider, more substantial raceway that can comfortably hold all your cables without bulging at the seams.
The real pro move is in the finishing touches. Before you stick it to the wall, give the plastic a light sanding and a coat of primer. Then, paint the raceway with the exact same paint as your wall. This simple step helps the channel blend right in, making it almost disappear, especially if your walls have any texture.
It’s no surprise that sales of these non-invasive cable raceways have jumped by about 30% since 2020. This shows a huge number of people want a clean look without the mess of an in-wall job. These products keep your walls intact and give you easy access if you ever need to swap out a cable. You can check out more creative cord-hiding methods at Homemakers.com for other great ideas.
Decorative and Fabric Alternatives
For a more design-focused solution, why not try something that isn't trying to hide at all? Decorative fabric cord covers have become a stylish alternative, now accounting for an estimated 12% of the cord management market. These soft, flexible sleeves are available in tons of colors and patterns, turning your cable run into a deliberate part of your room's design.
They're perfect for matching your decor, whether you want a subtle neutral tone or a bold, contrasting pop of color. This approach works especially well when you have a bit of distance to cover between the TV and a media console. Instead of an awkward plastic strip, you get a touch of texture and visual interest.
Handling Power Cables Without Burning Your House Down
When you're figuring out how to hide wires behind a wall mounted tv, it's easy to think of the power cord as just another cable to tuck away. But hold on—this is a critical mistake. Shoving your TV's standard power cord behind the drywall isn't just a bad idea; it's a major fire hazard and a direct violation of electrical codes. The plastic sheathing on a regular cord isn't rated for in-wall use, meaning it can't handle the heat buildup or resist damage from pests, creating a genuinely dangerous situation.
This is exactly why specialized in-wall power kits were created, and they've become the go-to solution for pros and savvy DIYers alike. In fact, these kits have seen a 25% rise in adoption across North America because they make the job safe and simple. These kits give you everything needed to legally run power up to your TV, usually including two recessed outlets connected by a pre-wired, in-wall-rated electrical cable. You can find out more about these all-in-one power solutions on legrand.us to see how they work.
Before you start feeding wires into the wall, it's important to understand which cables are safe for this type of project. The table below breaks down common cable types and the safety ratings you need to look for to stay compliant and, more importantly, safe.
| Cable Type | Rating Required | Use Case | Code Compliance |
|---|---|---|---|
| Power Cable | CL2 or CL3 | Running power from an existing outlet to a new one behind the TV. | Essential for meeting National Electric Code (NEC) standards for in-wall power. |
| HDMI Cable | CL2 or CL3 | Connecting video sources like cable boxes or gaming consoles to the TV. | Ensures the cable's jacket is fire-resistant for safe in-wall use. |
| Ethernet Cable | CMR (Riser) or CMP (Plenum) | Providing a hardwired internet connection to a smart TV. | CMR is for vertical runs between floors; CMP is for air circulation spaces. |
| Speaker Wire | CL2 or CL3 | Connecting passive speakers or a soundbar to an AV receiver. | Required for running speaker wires inside walls or ceilings. |
This guide helps ensure you're not just hiding wires, but doing so in a way that is fully up to code and won't cause problems down the road. Using the correctly rated cables is a non-negotiable part of the job.
Keeping Power and Signal Cables Separate
With your power solution handled, here’s another pro tip: keep your power cables physically separated from your low-voltage signal cables like HDMI, Ethernet, or optical audio. When high-voltage power lines run parallel and too close to signal wires, they can create electromagnetic interference (EMI). This pesky interference can ruin your movie night with a fuzzy picture, distracting static, or even a total signal blackout.
To prevent this, aim to run the different types of cables on opposite sides of a wall stud. If you're using an in-wall kit with divided channels, make sure to use them as intended. This simple physical separation is almost always enough to maintain a clean signal and ensure your setup operates perfectly. For more smart ways to organize your setup, check out our guide on cable management ideas. Sticking to these safety practices is the key to a professional-looking and reliable installation.
When Things Go Wrong and How to Fix Them
Even with the most careful planning, the moment you open up a wall, you're bound to find a surprise. The real test of a DIY project isn't just following the steps, but how you adapt when things don't go as planned. It's a classic moment: your fish tape hits a solid thud halfway down the wall cavity. Don't panic—it’s most likely a fire block, a horizontal piece of wood that's part of your home’s structure.
Navigating Unexpected Obstacles
When you run into a fire block, you have a couple of solid options. The most direct fix is to cut a small, temporary hole right where the obstruction is. This lets you drill a path through the wood and keep fishing your cable down. A more advanced technique, if you want to avoid extra cuts, is to use a flexible, 1/4-inch auger bit on an extension. This allows you to drill through the block from your original top or bottom opening, though it does take a bit more finesse to get right.
Fire blocks aren't the only potential roadblocks. You might find dense insulation that snags your fish tape or discover unexpected wiring exactly where you wanted to run your cables. If insulation is the issue, a more rigid fiberglass fish tape can often push through where a flexible steel one gets caught. When you find other wires, your only safe move is to choose a different path. Never try to force your cables through a crowded space. If your ideal spot just won't work, get creative. We explore alternative solutions in our guide for mounting a TV in a corner, which can offer some great ideas.
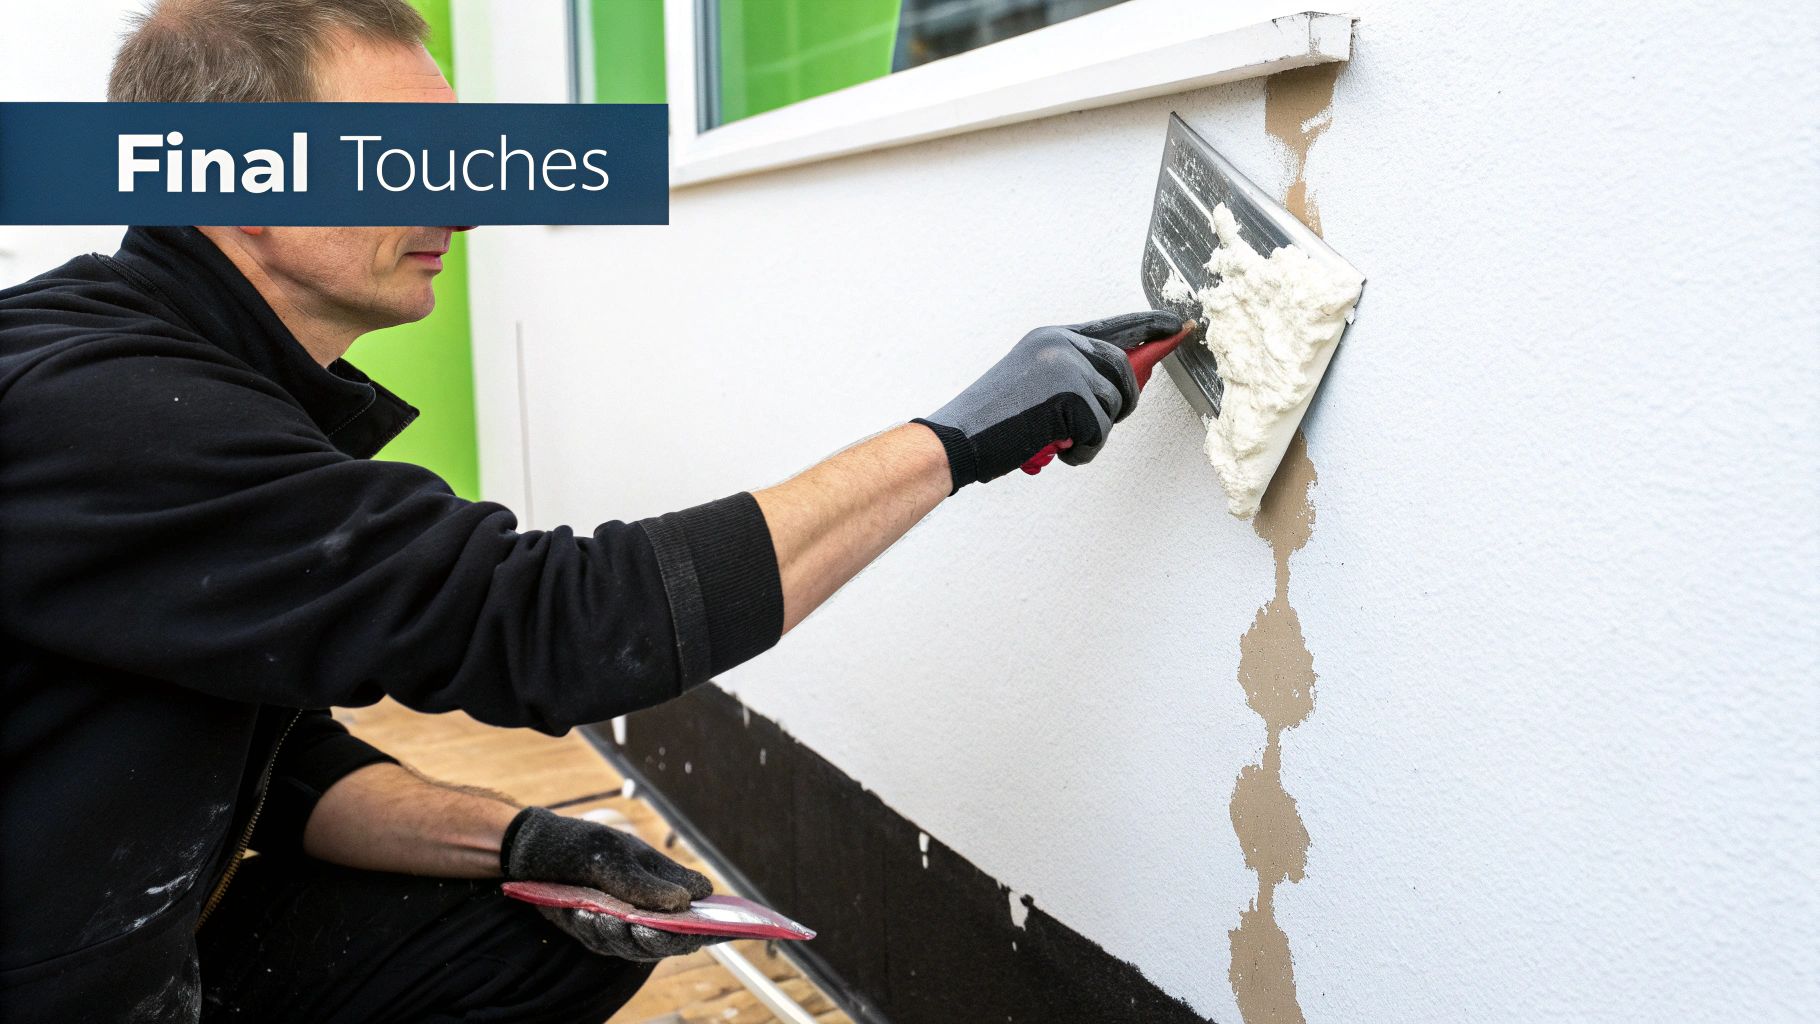
Repairing Minor Wall Damage
No matter how careful you are, small nicks and slightly oversized cuts can happen. Knowing how to do a clean repair is what makes the final result look professional.
- For minor scrapes: A little spackle, a quick pass with sandpaper, and a dab of touch-up paint are usually all you need to make it disappear.
- For oversized holes: If your new wall plate doesn't quite cover the hole you cut, don't worry. A simple drywall repair patch can reinforce the area before you apply spackle, giving you a solid surface for a seamless finish.
Being ready for these small fixes is part of the process. It ensures your finished project looks fantastic, even if you hit a few bumps along the way.
Key Takeaways
Learning how to hide wires behind a wall mounted TV comes down to smart planning and picking the right method for your space. Whether you're ready to cut into the drywall or prefer a simpler surface solution, the goal is always a clean, professional finish. Here’s a quick guide to getting that seamless look you see in magazines.
Your Strategy Checklist
Before you grab a single tool, take a moment to think through these key points. Your answers will steer you toward the best approach, saving you from future headaches and a messy wall.
- Assess Your Wall First: What kind of wall are you working with? Is it drywall, plaster, or something else entirely? A stud finder is your best friend here. Use it to map out where studs, fire blocks, and any existing electrical lines are hiding before you even think about making a cut. This is the single most important bit of prep work.
- In-Wall vs. Surface-Mount: An in-wall kit gives you that truly invisible look but means cutting into your drywall. If you’re renting or just aren't up for that level of DIY, a paintable surface raceway is a great alternative that can blend in surprisingly well. Be honest with yourself about your comfort level and what your living situation allows.
- Power Requires a Plan: This is a big one. You can't just snake your TV's regular power cord through the wall—it's against electrical code and creates a serious fire hazard. You must use a purpose-built in-wall power kit to safely get electricity to your TV.
Measuring Success and Maintenance
So, how do you know you've nailed it? The true sign of a successful project isn't just that it looks good, but that it's also safe and functional. Your TV should appear to float on the wall, with zero distracting cables pulling your eye away from the screen.
To keep everything looking sharp, give your setup a quick check every now and then. Make sure all your connections are still snug, especially if your TV is on a full-motion mount that moves around. If you used a surface raceway, press on it gently to ensure the adhesive is still holding tight. A few minutes of maintenance once a year will keep your clean setup looking perfect.
Ready to build the entertainment space you've been dreaming of? Check out our complete lineup of TV mounts and cable management gear at Mount-It! to find everything you need for your project.